Check out the crafty ideas below
- A daisy wreath for a sweet welcome.
- Fig branches and maidenhair fern make a lovely presentation for die-cut daisy butler cards.
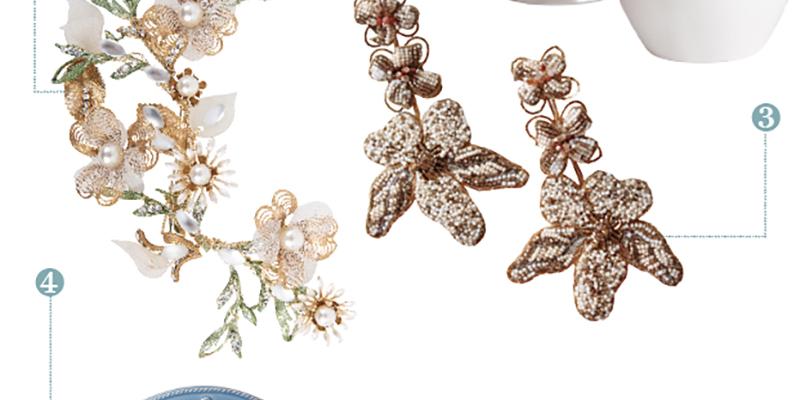
- Trim a plain headband in daisies for your flower girl.
- Give vintage daisy necklaces to your bridesmaids.
- Personalize t-shirts with an iron-on transfer to give as favors.
- Create custom wrap with a scanned image printed onto oversized paper.
- A favor box is adorned with ribbon and a button.
- A special gift box is made pretty with embossed paper, ribbon, and a button (see how-to below).
- Scan and print a daisy image, paste onto a bag, and drop seeds inside as a favor.
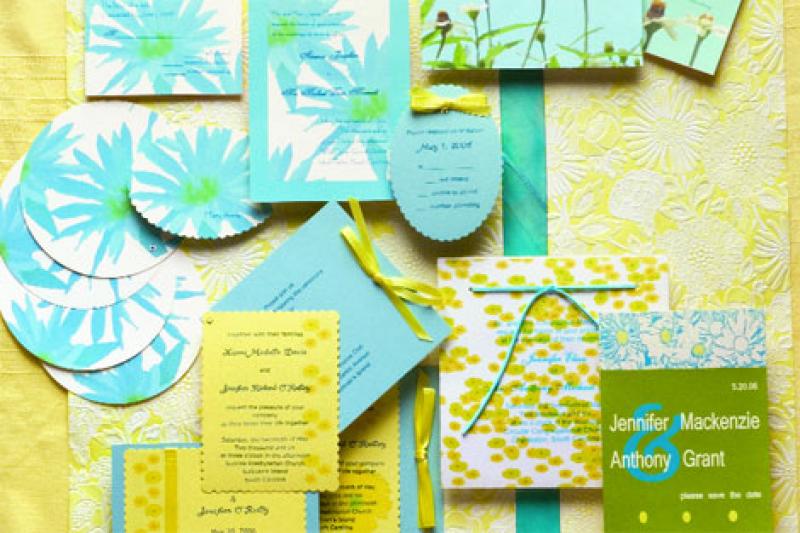
- Card-stock with a die-cut window makes a fun save-the-date.
- Ribbon and a silk daisy turn a plain purse into a clever corsage for the mother of the bride.

“The daisy is back in a big way. Reinvented, it heralds summer’s return perfectly.” —Lisa Thomas
From a dainty save-the-date card to a program that expands into a fan for steamy summer ceremonies, let daisies be the inspiration for all your wedding stationery. Staying within a yellow and blue color scheme, Thomas and Out of Hand co-worker Kim West played with images taken on a digital camera, manipulating them to make pretty patterns and printing them out on quality cardstock. Try adding vintage ribbon for a timeless look; finding it is half the fun.

Good Giving
This easy-to-craft box is a creative way to present your bridesmaids’ gifts
You will need: Approximately two feet of ribbon, a cardboard jewelry box, a sheet of daisy-embossed paper, corrugated cardboard, a daisy button, double-sided tape, glue, and an Exacto knife.

Step 1
Cut a sheet of paper so that it’s 1.5 inches larger than the box top on all sides. Apply strips of double-sided tape to the top of the box as well as the inside edges. Center the top face down on the overturned paper.

Step 2
Fold the paper up over each side of the box and press against the inside edge so that it adheres securely. You will have triangles of extra paper at each corner—cut them off with your Exacto knife.

Step 3
Apply tape to side and bottom edges. Beginning at the bottom’s center, adhere ribbon right side up, creating a handle over the top, and then adhere down left side so that it ends back at the bottom center. Cut excess ribbon.

Step 4
Put a dab of glue on the bottom of the button and center it near the top of the lid. Fit corrugated cardboard into the bottom of the box and lay the bridesmaid’s vintage daisy necklace across it.